The purpose of this document is to go through the installation of the Platform Services Controller PSC version 6.5, as part 1 of the vCenter Server (Appliance) deployment with an external PSC.
vCenter Server and the vCenter Server components are deployed on one system, and the services included in the Platform Services Controller are deployed on another system.
The following components are included in the vCenter Server and vCenter Server Appliance installations:
- The VMware Platform Services Controller group of infrastructure services contains vCenter Single Sign-On, License service, Lookup Service, and VMware Certificate Authority.
- The vCenter Server group of services contains vCenter Server, vSphere Web Client, vSphere Auto Deploy, and vSphere ESXi Dump Collector. vCenter Server for Windows also contains the VMware vSphere Syslog Collector. The vCenter Server Appliance also contains the VMware vSphere Update Manager Extension service.
For more information about vSphere 6.5 please refer to the official VMware vSphere documentation here.
For What is Νew in vSphere 6.5 click here.
Let’s start with the installation of the external PSC.
Download the VMware vCenter Server Appliance 6.5 ISO from VMware downloads.
You will see below that the VCSA installer has changed dramatically, it’s a lot cleaner, simpler, and many deployment options (install, upgrade, migrate, restore) are bundled into the same one installer.
Let’s do it.
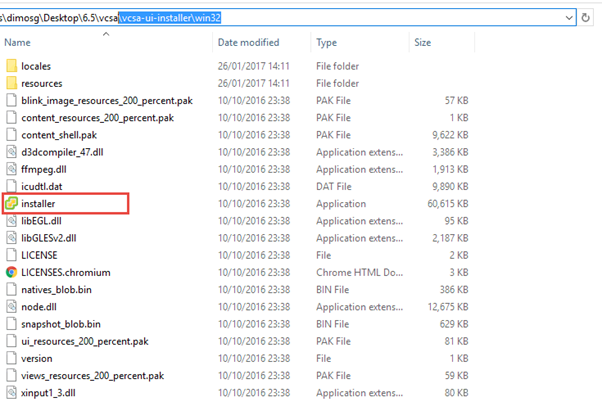
Mount the ISO on your computer. Browse to the corresponding directory, in my case \vcsa-ui-installer\win32
Double click the installer (in some cases you might need to right click and Run as Administrator)
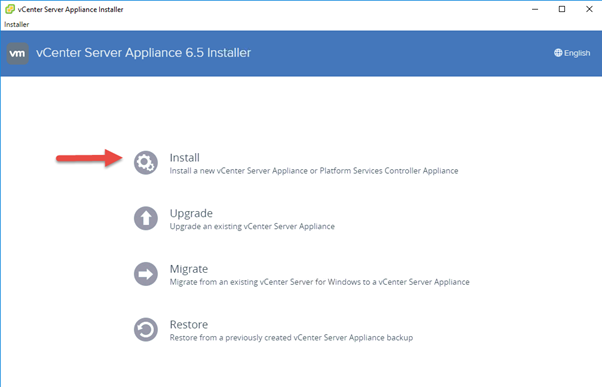
We will be installing a new PSC so click Install below
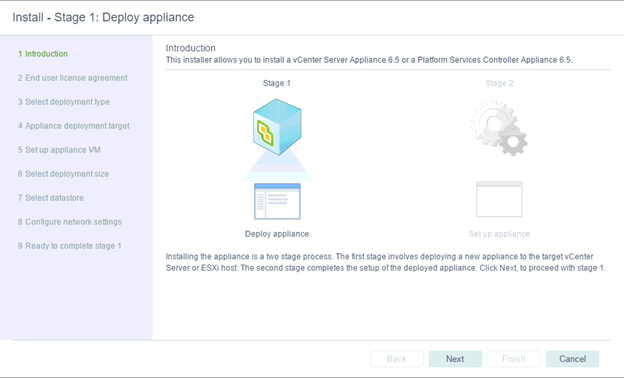
Click Next on the Introduction
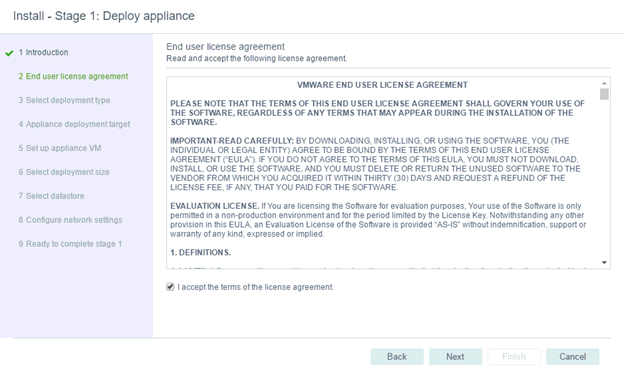
Accept the EULA and click Next
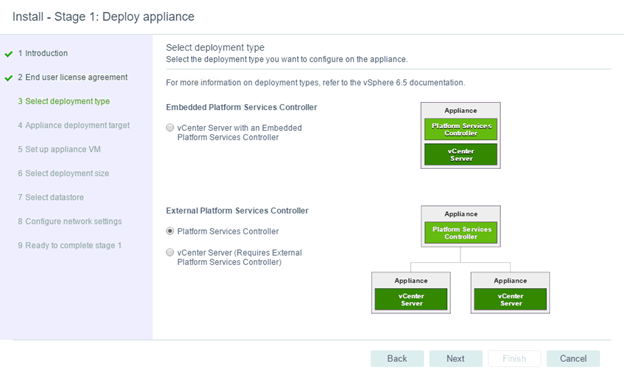
Select External Platform Services Controller “Platform Services Controller” and Click Next:
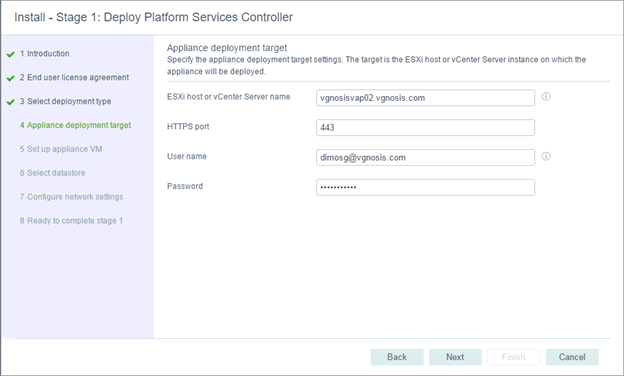
Specify the target (ESXi or vCenter Server), in my case a vCenter Server, and an account with appropriate permissions, and click Next:
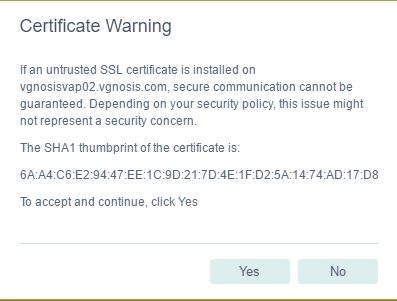
Accept the certificate:
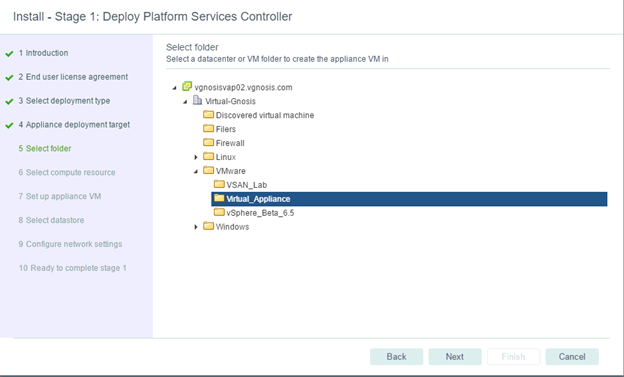
Select the folder where you want to create the PSC and click Next:
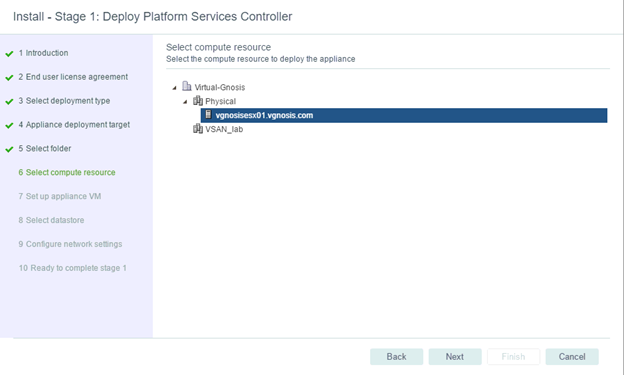
Select the compute resource (if you pointed to a vCenter Server) and click Next:
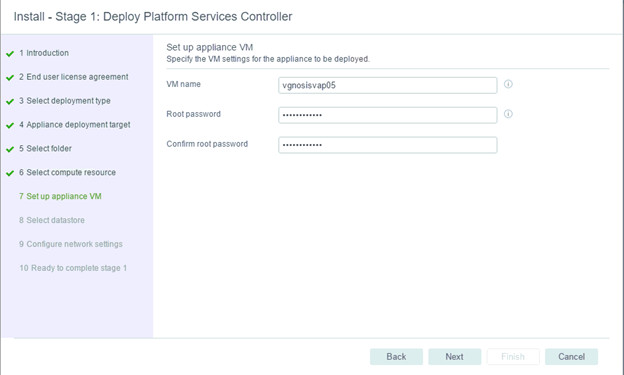
Give the Appliance a VM Name, and specify the Root password and click Next:
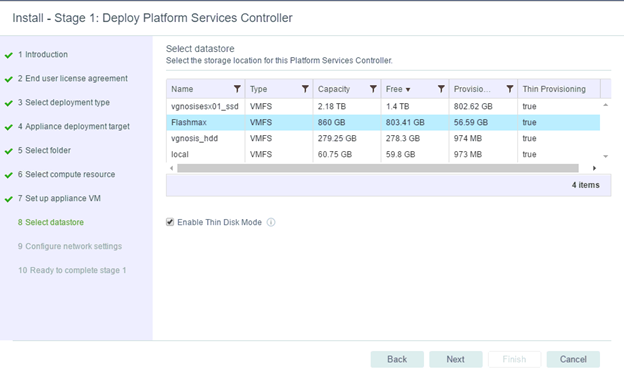
Select the Datastore for the Appliance’s storage location and click Next:
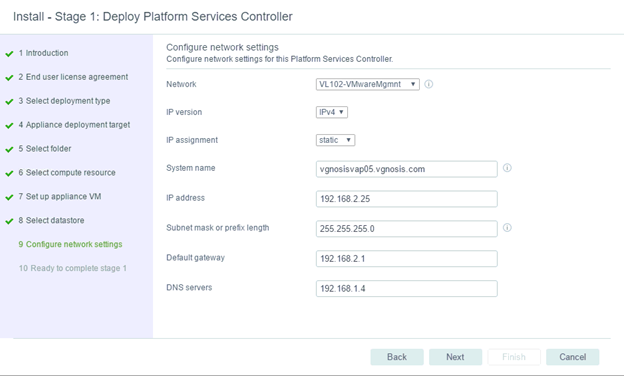
Specify the Network Settings for the PSC
Port Group, hostname, IP, Subnet Mask, default gateway, and DNS server
I created a static host entry in my DNS beforehand
Click Next:
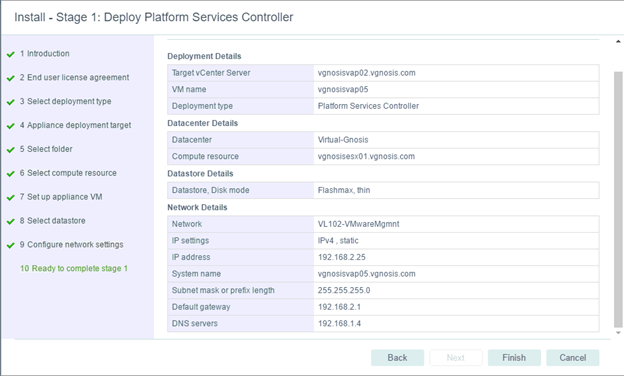
Review all Deployment details and then Click Finish:
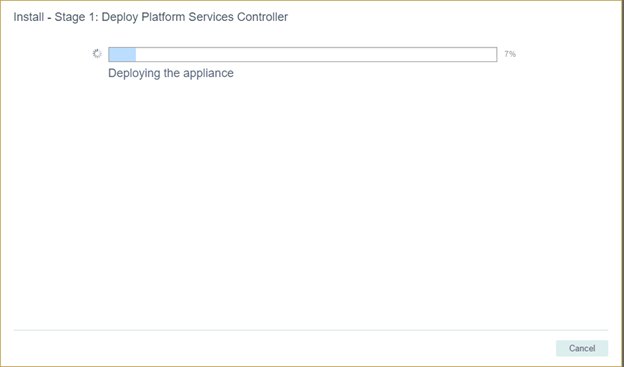
At this point the OVA will be deployed and configuration will be applied.
You can watch progress as below.
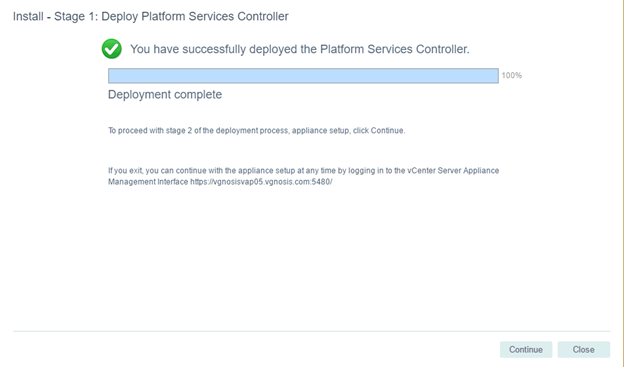
At this point the Stage 1 Installation is complete. To continue with Setting up the PSC we have 2 options:
- To close the wizard and go to the vCenter Server Appliance Management Interface (VAMI) and set up the PSC there using the root credentials
- To Continue using the wizard and Set Up the PSC
We will continue with the wizard.
So, lets click Continue:
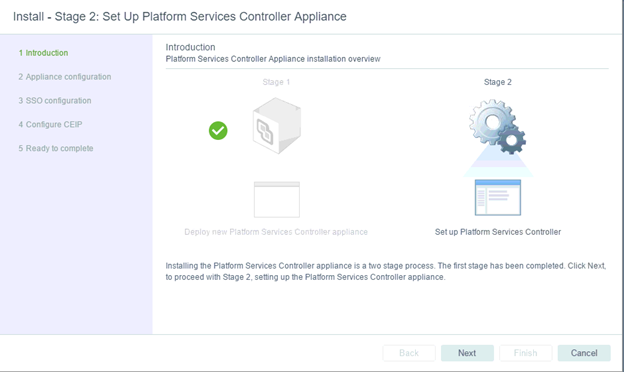
On the Introduction page click Next:
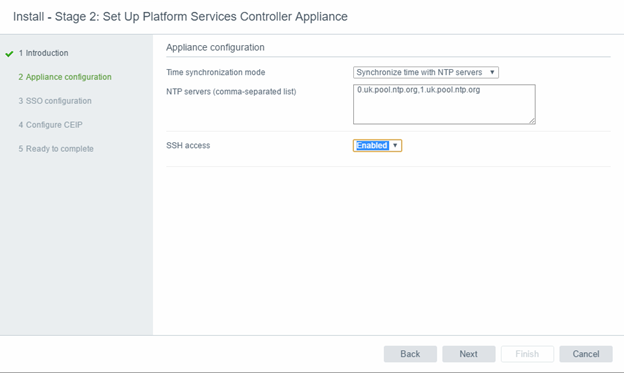
Specify NTP servers for time synchronization (it can also sync time from the ESXi host, but I personally prefer to use NTP), also SSH access to enable if you want shell access to the PSC, and click Next:
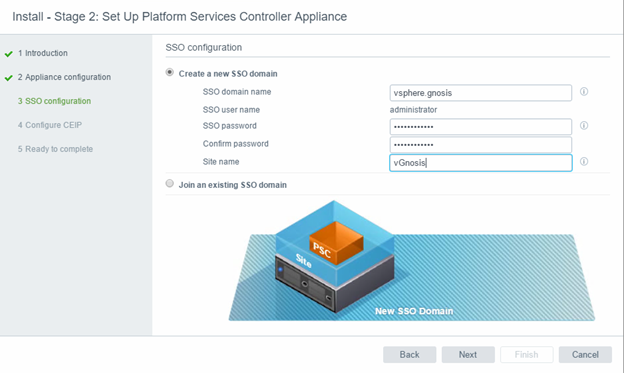
As this is a new installation, lets create a new SSO domain by specifying its Name, Site Name, and the Administrator’s password, and click Next:
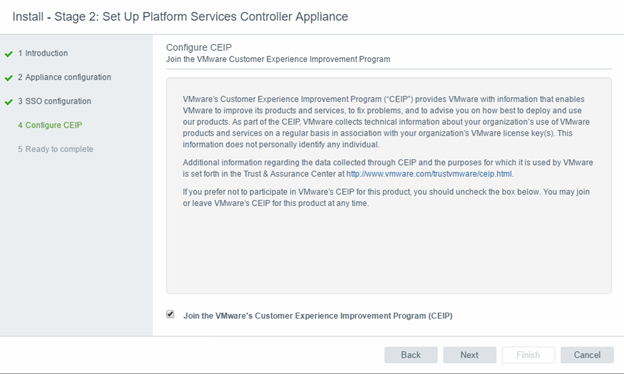
at the next screen screen you can select whether to join the Customer Experience Improvement Program (something I do in my Lab), and Click Next:
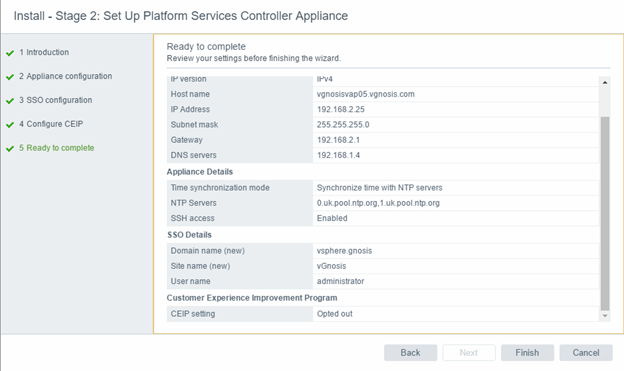
Review the PSC settings and click Finish:
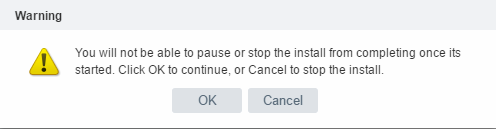
Click OK on the Warning to continue:
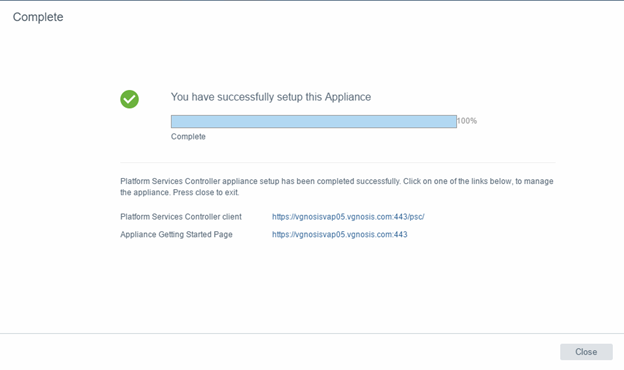
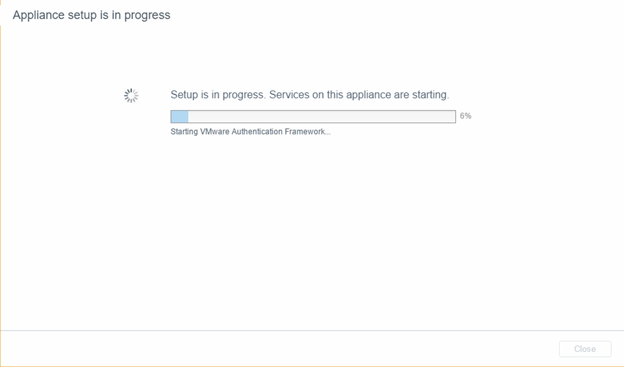
You can watch progress of the Setup on the next screen:
and Voila! PSC deployment and Set Up is complete.